Welcome to the SaaS (Software as a Service) Starter Pack series. In this series we’re building a SaaS app from scratch using bleeding edge technologies. The end goal is to have a minimal, ready to deploy application that you can use as a starting point for rapidly prototyping your next SaaS business idea.
This is going to be an ever-evolving series; as the technologies we use change, so will this series. I’ll be continually returning to the posts and associated repo to update them as new versions of the technologies are released.
In this pilot episode we’ll be setting up a repository with TypeScript, NextJS 13 (with the experimental /app directory), Tailwindcss, and finally deploying it to Vercel.
TL;DR 👉 SaaS Starter Pack
Table of contents
Open Table of contents
Prerequisites
- Node.js
- IDE (I’ll be using VS Code)
- Package Manager (I’ll be using pnpm)
- git
- GitHub Account
- Vercel Account
Initializing the TypeScript NextJS 13 App and pushing to GitHub
First, we need to initialize a NextJS 13 app with TypeScript and the experimental app directory. To do this, we will use the create-next-app command.
pnpm create next-app@latest --experimental-app --typescript saas-starter-packNote: Select ‘yes’ when prompted to use ESLint.
This will create a new directory called saas-starter-pack and initialize a NextJS 13 app with TypeScript and the experimental app directory. Now simple change into the directory, open it in your favorite IDE, and start the development server.
cd saas-starter-pack
code .
pnpm dev
Note: Make sure to select ‘Yes’ when the following VS Code prompt appears:
This workspace contains a TypeScript version. Would you like to use the workspace TypeScript version for TypeScript and JavaScript language features?
This plugin adds a lot of nifty TypeScript features to VS Code.
Now you should be able to navigate to http://localhost:3000 and see the default NextJS 13 app.
Finally, let’s create a new repository on GitHub (I’m naming mine the same as local: “saas-starter-pack”) and copy the second set of commands from the GitHub repo creation page. Here’s mine for reference:
git remote add origin https://github.com/Seth-McKilla/saas-starter-pack.git
git branch -M main
git push -u origin main
Your repo is now initialized locally & remotely. Boring tasks are officially done ✅ on to the fun stuff!
Adding Tailwindcss
Next up is adding Tailwindcss. Lucky for us, Tailwind has exactly what we need: Adding Tailwindcss to NextJS using the app directory.
⚠️ Ignore step 1 as we’ve already done this.
Rather than rehashing the Tailwindcss docs, checkout the below commit which has all these steps completed & boilerplate removed.
Font customization
I’m an Inter fanboy so I’m going to use that as my custom font. To do this, we first need to install @next/font.
pnpm add @next/fontThen we simply import the font, instantiate it, and add it to our root html element.
// app/layout.tsx

import './globals.css';
import { Inter } from '@next/font/google';

const inter = Inter();

export default function RootLayout({
  children,
}: {
  children: React.ReactNode;
}) {
  return (
    <html lang="en" className={inter.className}>
      <head />
      <body>{children}</body>
    </html>
  );
}
While we’re here, let’s also add a few styles to the root page to personalize the welcome text (this will be the future landing page of the final SaaS app template).
// app/page.tsx

export default function Home() {
  return (
    <h1 className="text-3xl font-bold grid h-screen place-items-center">
      Welcome to the SaaS Starter Pack!
    </h1>
  );
}
Last but not least, we need to specify a subset of the font to load. In a nutshell, this is a way to reduce the size of the font file by only loading the characters that we need. This is easily done in the next.config.js file.
// next.config.js

/** @type {import('next').NextConfig} */
const nextConfig = {
  experimental: {
    appDir: true,
    fontLoaders: [
      { loader: '@next/font/google', options: { subsets: ['latin'] } },
    ],
  },
};

module.exports = nextConfig;
Looking better already! 🎉
Deploying to Vercel
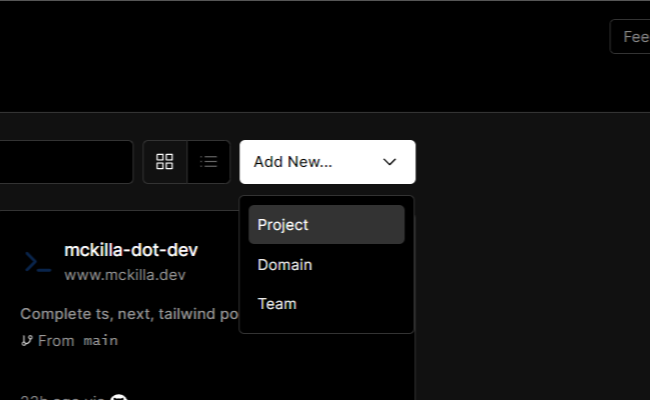
First, we need to create a new project on Vercel. This can be done by clicking the “Add New…” dropdown button on the Vercel dashboard and selecting “Project”.
Next, we need to connect our GitHub repo to Vercel. This can be done by clicking the “Import Project” button on the Vercel dashboard and selecting the “From Git Repository” option.

Then simply click the big blue “Deploy” button to ship the app to production and automatically get a publicly accessible URL! 🎉
Wrapping up & next steps
That’s it! We’ve successfully created a Typescript NextJS 13 app with Tailwindcss from scratch and deployed it to Vercel. This is an excellent starting point for diving into the exciting world of SaaS app development.
Next up, we’re going to dive into wiring up the app to a database using the seamless MongoDB Atlas integration. Stay tuned!