Welcome to the SaaS (Software as a Service) Starter Pack series. In this series we’re building a SaaS app from scratch using bleeding edge technologies. The end goal is to have a minimal, ready to deploy application that you can use as a starting point for rapidly prototyping your next SaaS business idea.
This is going to be an ever-evolving series; as the technologies we use change, so will this series. I’ll be continually returning to the posts and associated repo to update them as new versions of the technologies are released.
In this episode we’ll be connecting our NextJS 13 app to MongoDB Atlas with Vercel using the MongoDB Atlas integration. If you haven’t already, I recommend you read Part 1 before continuing.
TL;DR 👉 SaaS Starter Pack
Table of contents
Open Table of contents
Prerequisites
- Our app deployed to Vercel from Part 1
- A MongoDB Atlas account
- The Vercel CLI installed
If you’d like to pick up where we left off in the previous post, run the following commands:
git clone https://github.com/Seth-McKilla/saas-starter-pack.git
cd saas-starter-pack
git checkout Part-2
pnpm install
Configure MongoDB Atlas Integration
First things first, let’s wire up our app deployed to Vercel with the MongoDB Atlas integration 👈 Go ahead and click that hyperlink and select the “Add Integration” button in the top right corner.

Note: This configuration only needs to be done once per Vercel account, if you see “Configure” instead of “Add Integration, scroll down to the “Access” section of the page and click “Manage Access” to add another repository to the integration.
I’m going to assume that you haven’t used the MongoDB Atlas integration before since you’re reading this blog post 😅 If you have used it before, you can skip to the next section.
The next few steps are pretty self explanatory, so rather than overloading you with screenshots, I’ll just briefly summarize each step:
- Select your Vercel Scope (if you have multiple Vercel accounts)
- Select your deployed Vercel Project from Part 1 (I prefer this over the “All Projects” option)
- Select “Add Integration” to begin the MongoDB Atlas OAuth flow
- Select your MongoDB Atlas account or sign up for a new one
- Choose “Create a new Atlas organization” (I prefer a new org for each project to keep things organized)
- Click “I Acknowledge” to agree to the terms of service (the organization name can be changed later through the MongoDB Atlas dashboard)
- Select preferred region and then click “Create New Cluster and Return to Vercel”
- That’s it! You now have a MongoDB Atlas cluster and a MongoDB Atlas integration configured for your Vercel project.
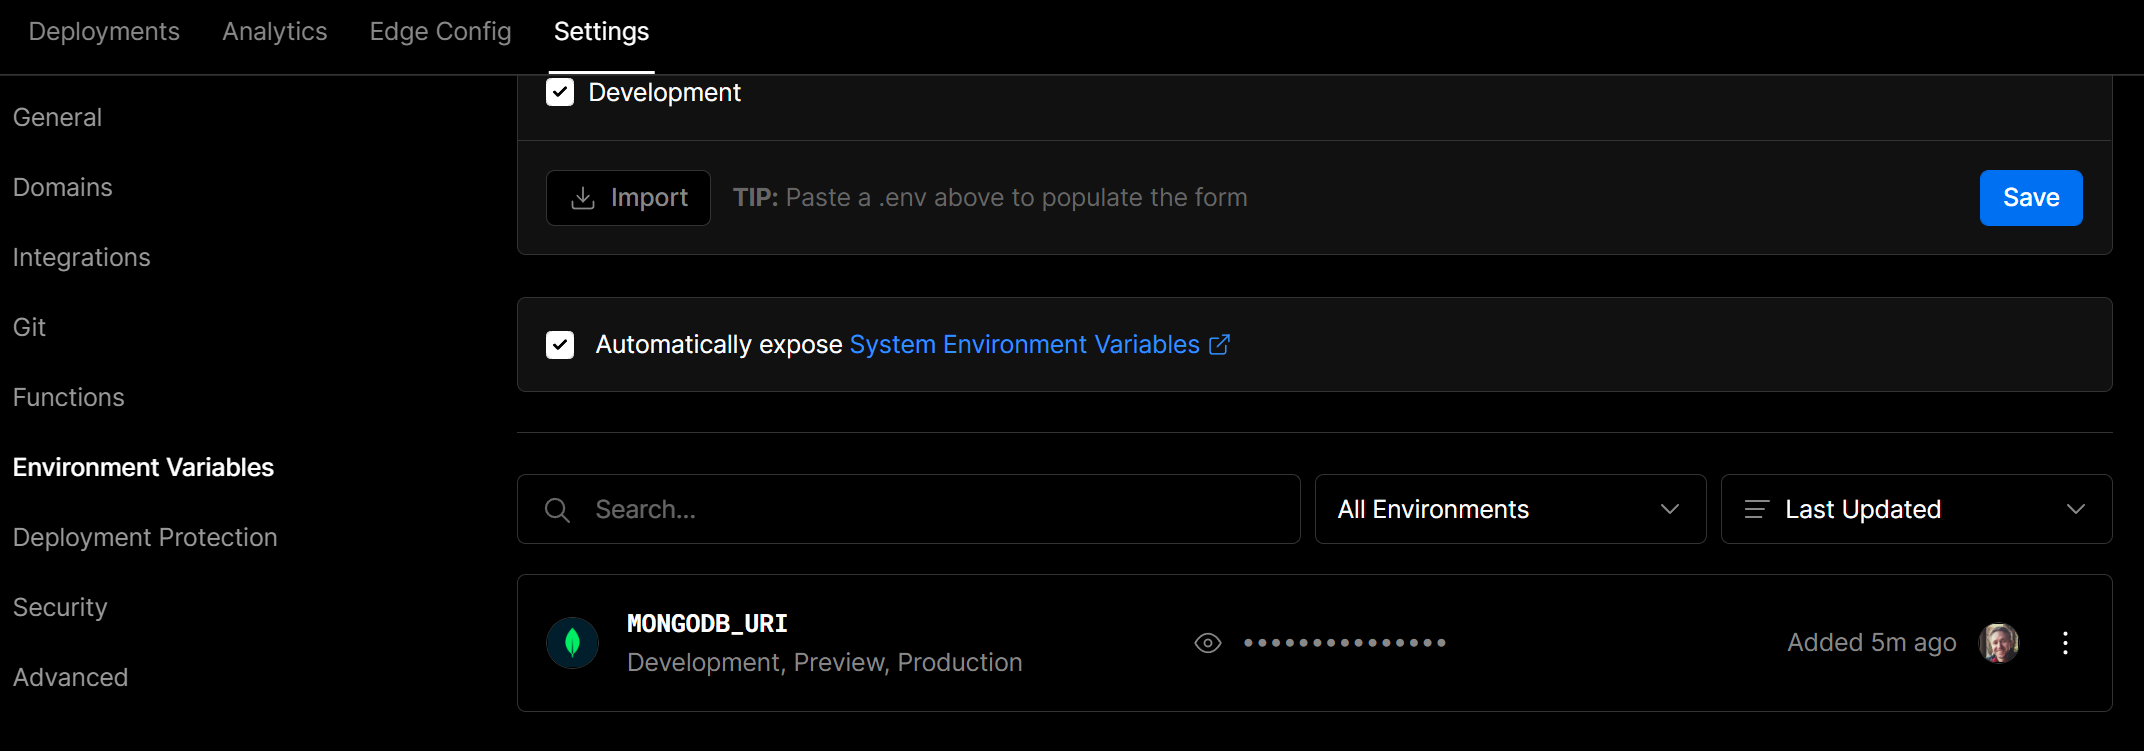
If you head over to your Vercel Project Settings page, you should now see that a MONGODB_URI environment variable has been automatically added to your project.
Adding a development database
A development database is crucial for testing and developing locally without affecting your production database. Let’s add a development database to our MongoDB Atlas project through the online Atlas dashboard.
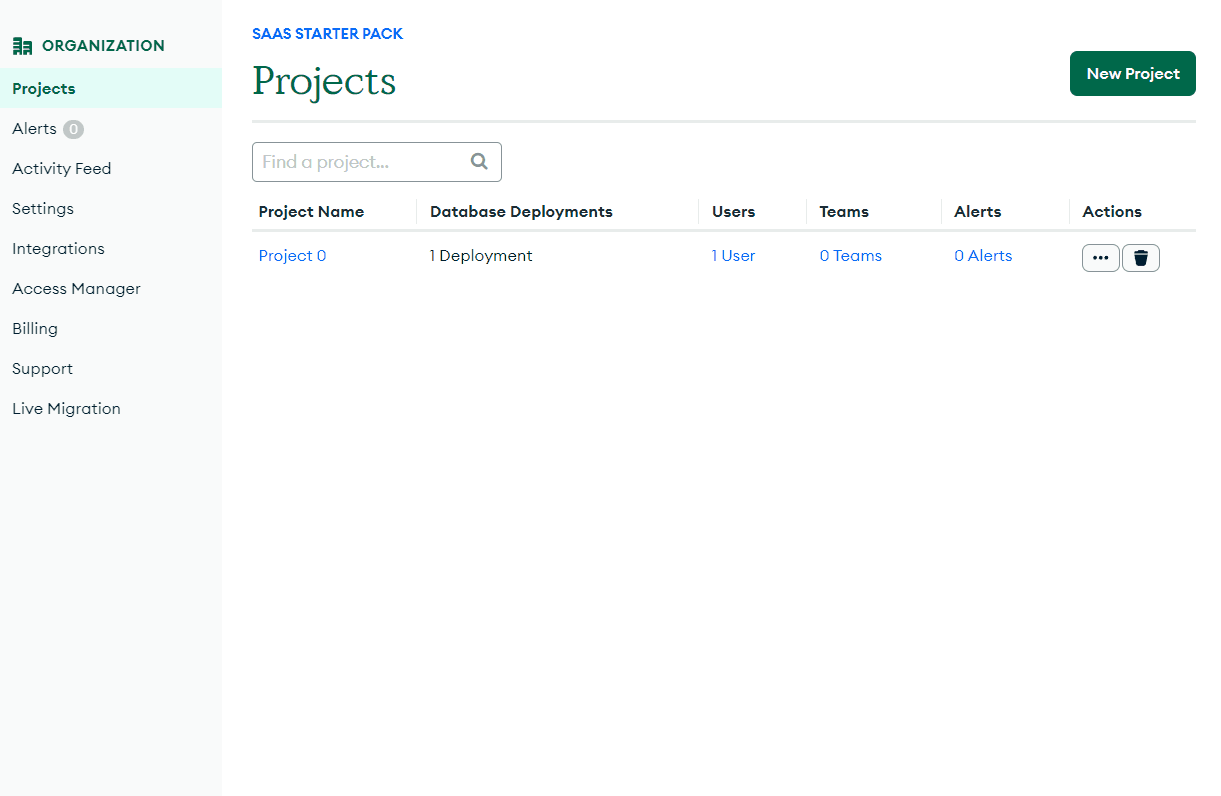
Updating the organization settings
Head on over to the MongoDB Atlas dashboard, log in with the same email you used to sign up for the integration, and make sure that you’re in the correct organization.

Let’s change the organization name to something more descriptive, like “SaaS Starter Pack”. Click the gear icon next to the organization name (or “Settings” in the side navbar), then the pencil icon in the “Organization Name” card to change the name to whatever you’d like.
Creating a development database
Now that we’ve updated the organization name, let’s create a development database. You could either create a new cluster or a new project, I personally prefer the latter so we’ll do that. First, let’s rename the existing project that’s already setup to “ssp-production” (or whatever you’d like) and then create a new project called “ssp-development”.
Next, create a new database using that big green “Build a Database” button. Choose the Shared Cluster option on the right and then you can simply keep all the default settings and click “Create Cluster”.
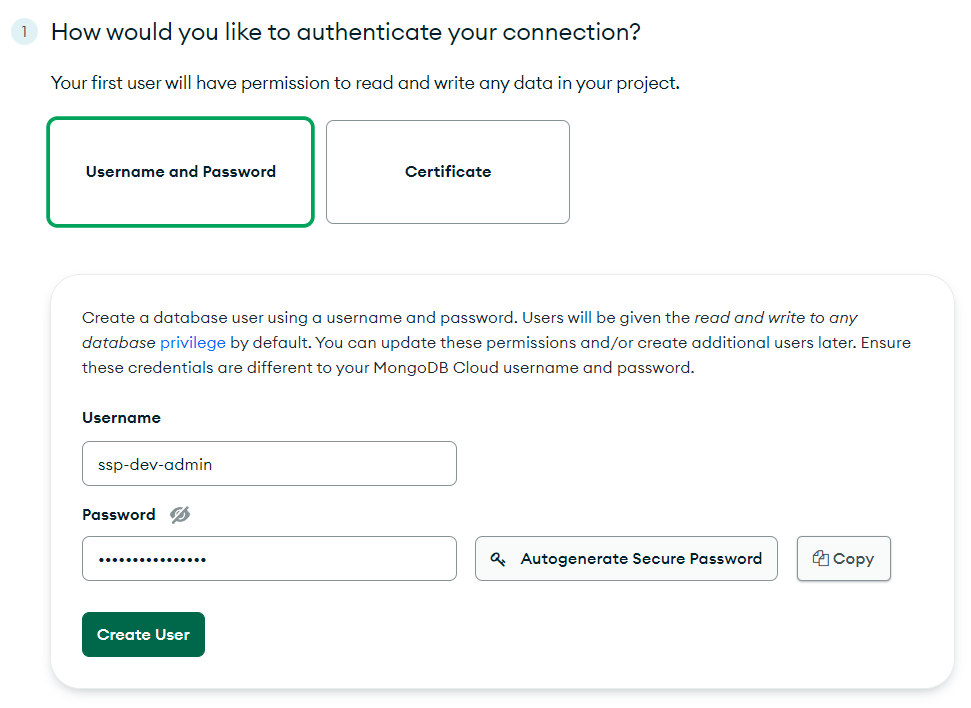
We’re going to authenticate our connection using a username and password. Choose a username, and then select “Autogenerate Secure Password” to generate a secure password. Then click “Create User”.
⚠️ Make sure to copy and save these credentials somewhere safe, you’ll need them later!
Last but not least, we need to configure the network access to our database. Choose the “My Local Environment” option and to keep things simple, we’re going to whitelist all IP addresses. Type in 0.0.0.0/0, add a description, and click “Add Entry”.
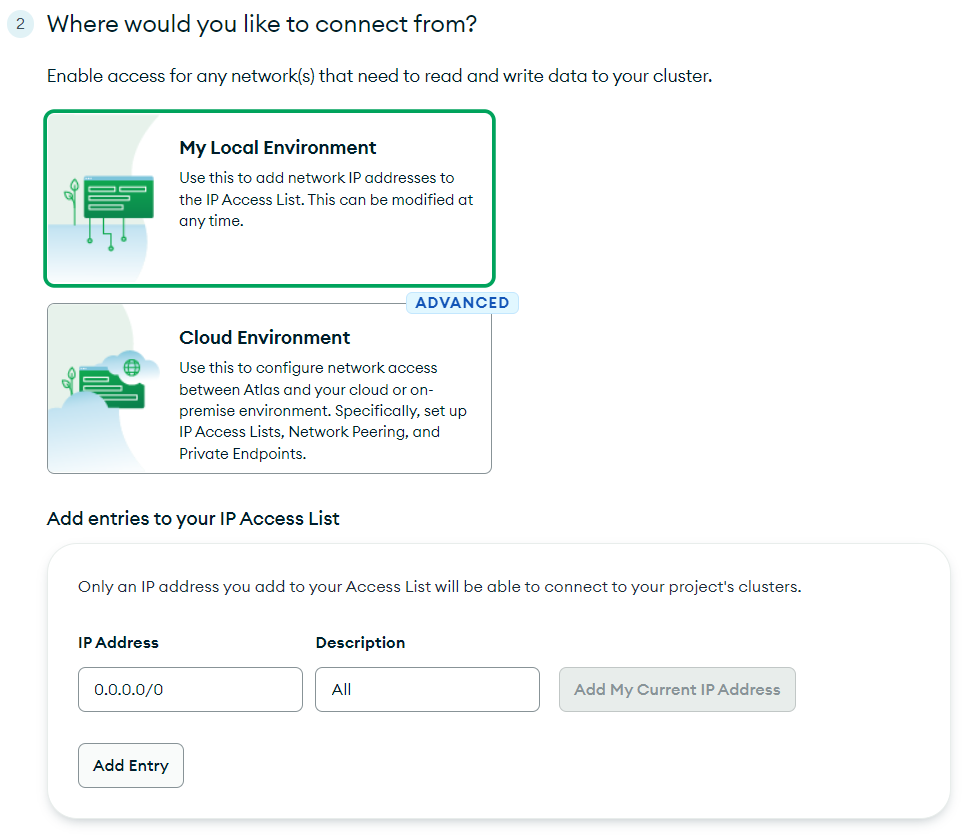
I find this is the easiest and least error prone method for getting started. And this is a development database so we’re not working with sensitive data.
Once all this is done, the “Finish and Close” button should be enabled. Click it and you should be taken back to the MongoDB Atlas dashboard.
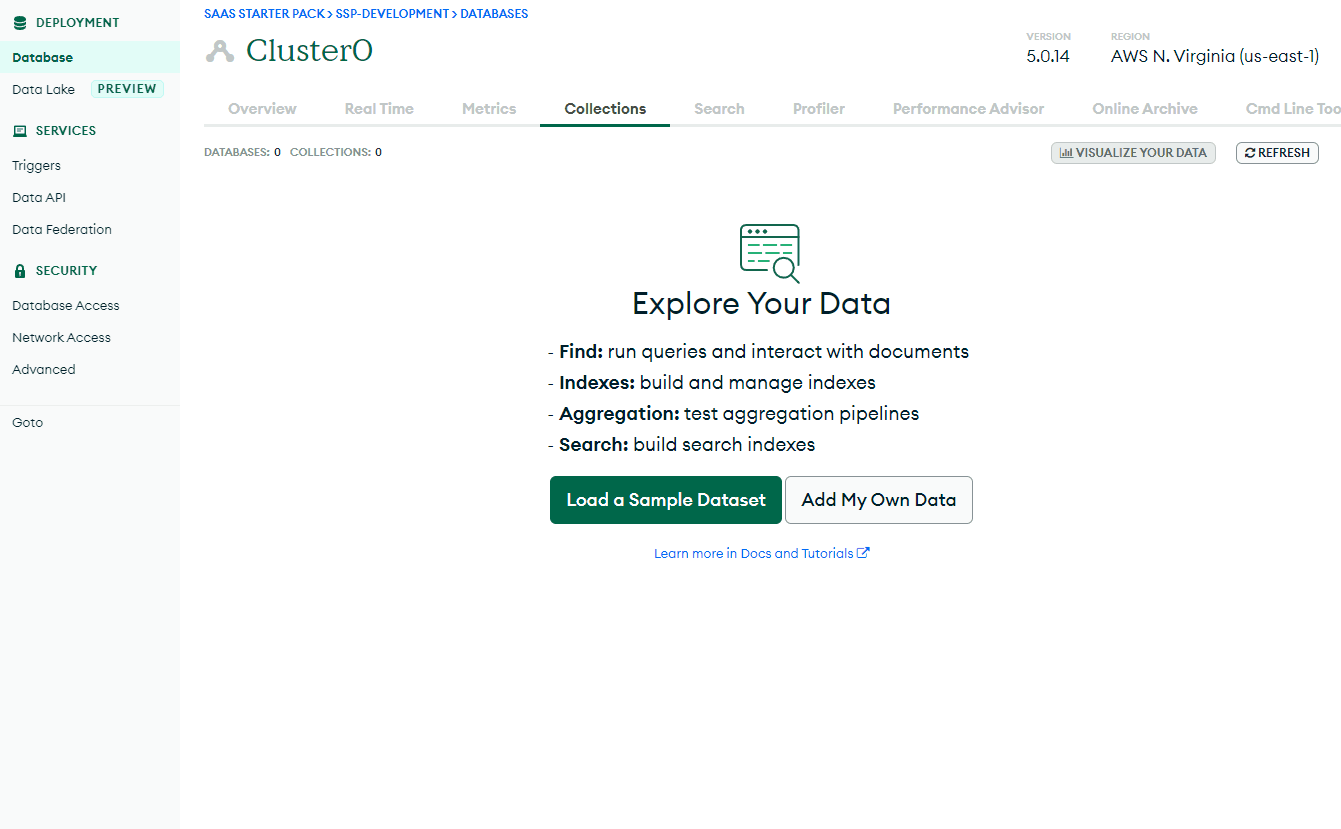
While we’re here, let’s add some dummy data to our development database so we can test out our app locally. Click the “Browse Collections” button on the cluster card, then click the “Add My Own Data” button. Enter “main” for the database name and “test” for the collection name, then click “Create Database”. Copy and paste the following JSON into the text box and click “Insert Document”.
{
  "message": "I guess this actually works!"
}
Syncing environment variables using Vercel CLI
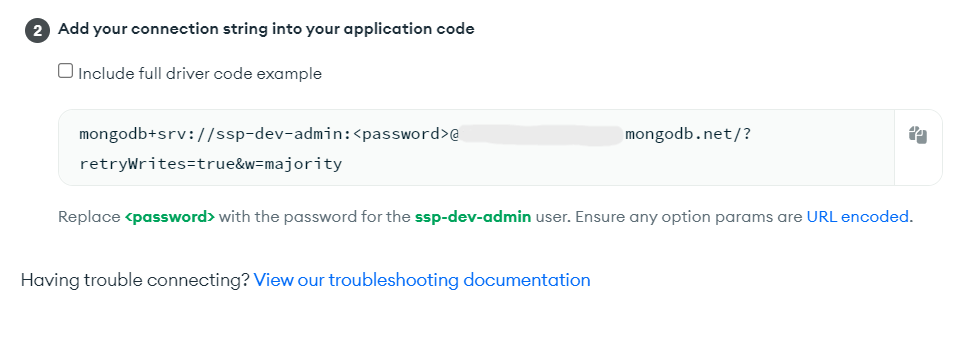
While we’re still here in the Atlas dashboard, let’s go ahead and copy our development database connection string. Click the “Connect” button on the cluster, then “Connect Your Application”, choose the second option “Connect your application”, and then copy the connection string under section 2.
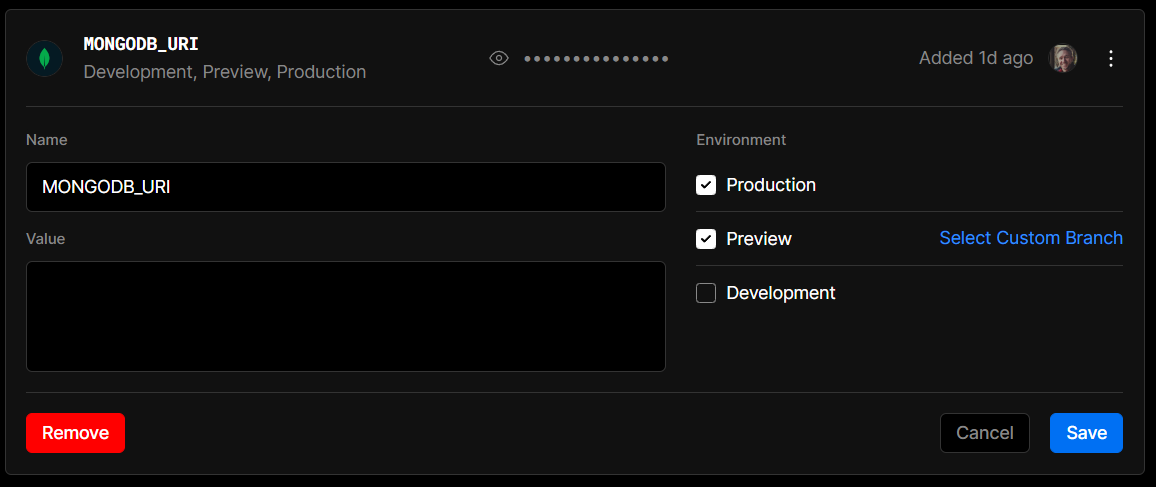
Now let’s head back over to Vercel to add this database connection string as an environment variable. First, update the existing MONGODB_URI environment variable to not include the “development” environment.
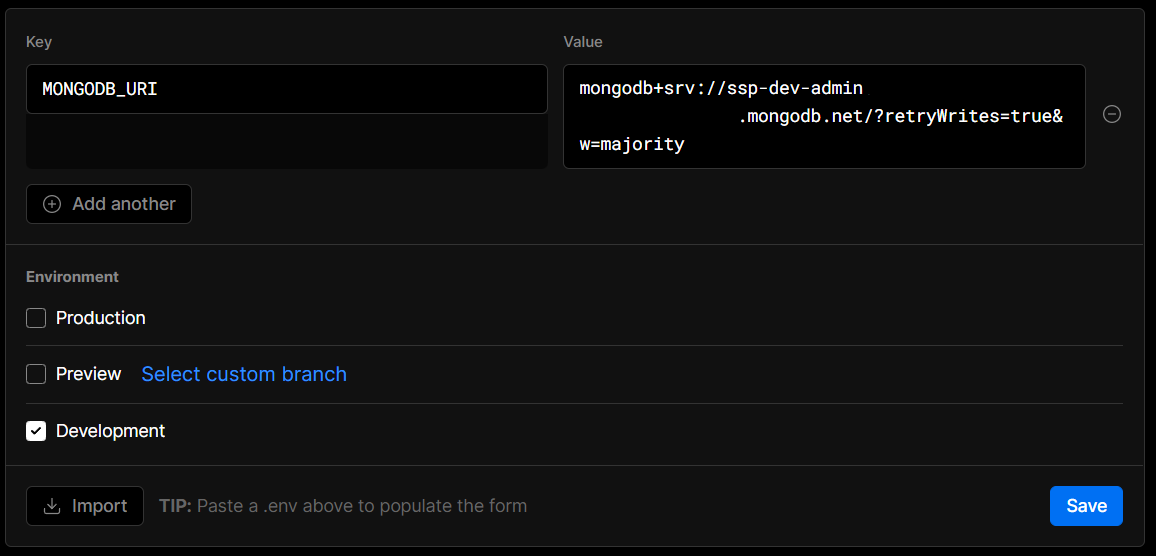
Then scroll up and add a new environment variable with the same exact name (MONGODB_URI) and paste in the connection string we copied from Atlas.
⚠️ Make sure to replace the <password> placeholder with the password you generated earlier!
Click save and you’re done! Now we can finally get back into our IDE!
Linking our Vercel project
For this section, make sure that you have the Vercel CLI installed and that you’re logged in to your Vercel account using the vercel login command in your terminal.
First, let’s link our Vercel project to our local project. Navigate to the root of your project and run the following command:
vc linkFollow the prompts to complete the linking process. Once that’s done, you should see a .vercel folder in the root of your project.
Vercel CLI 25.1.0
? Set up “~/src/side-projects/saas-starter-pack”? [Y/n] y
? Which scope should contain your project? Seth McCullough
? Found project “seth-mckilla/saas-starter-pack”. Link to it? [Y/n] y
✅  Linked to seth-mckilla/saas-starter-pack (created .vercel)
Pulling our environment variables
Now we can use the following beautiful command to pull down all of our “development” environment variables from Vercel and add them to our local .env.local file.
vc env pull .env.localIf you open up the newly created .env.local file, you should see the development MONGODB_URI environment variable that we added to Vercel earlier. Nifty!
Going forward, I strongly encourage changing your mindset to enter all environment variables through your Vercel dashboard and pulling from there. It has saved me so much time and headache having a single source of truth for environment variables.
Consuming data in our app
Now we need to link our app to our database. We’re going to achieve this by setting up a promise that will resolve to a MongoDB client. We’ll then use this client to query our database.
Creating the client promise
First things first, let’s add the mongodb package to our app. Run the following command in your terminal:
pnpm add mongodbThen we’re going to create a new directory called lib/mongodb in the root of our project. Inside this directory, create a new file called client.ts and add the following code:
// lib/mongodb/client.ts

declare global {
  var _mongoClientPromise: Promise<any>;
}

import { MongoClient } from 'mongodb';

const uri = process.env.MONGODB_URI as string;
const options = {};

let client: MongoClient;
let clientPromise: Promise<any>;

if (!process.env.MONGODB_URI) {
  throw new Error('MongoDB URI is not defined');
}

if (process.env.NODE_ENV === 'development') {
  if (!global._mongoClientPromise) {
    client = new MongoClient(uri, options);
    global._mongoClientPromise = client.connect();
  }
  clientPromise = global._mongoClientPromise;
} else {
  client = new MongoClient(uri, options);
  clientPromise = client.connect();
}

export default clientPromise;
Note: We’re going to have additional mongodb libraries in the future, so that’s the reason for additional mongodb directory inside of lib. Keeps things clean and organized 💫
Before we continue to the next section, let’s add the lib path to our tsconfig.json file:
// tsconfig.json

{
  "compilerOptions": {
    ...
    "paths": {
      "@/lib/*": ["./lib/*"]
    }
  }
}
Now we’re able to import libraries from our lib directory with the @/lib alias. For example, we can import our client promise like so:
import clientPromise from '@/lib/mongodb/client';Displaying data in our app
Now that we have our client promise set up, let’s go ahead and use it to query our database and display the data in our app. This is where the power of Next.js 13 and React server components really shines! We can simply update our Home component found within app/page.tsx to be asynchronous and await the data from our database 🤯
// app/page.tsx

import clientPromise from '@/lib/mongodb/client';

export default async function Home() {
  const data = await getData();

  return (
    <h1 className="grid h-screen text-3xl font-bold text-center place-items-center">
      {data[0]?.message}
    </h1>
  );
}

async function getData() {
  const client = await clientPromise;
  const db = client.db('main');
  const data = await db.collection('test').find({}).toArray();
  return data;
}
If you’ve followed along so far, you should now see the following when booting up your local development environment:

Hooray, we did indeed actually make it work! 🎉
Wrapping up & next steps
In this post, we learned how to create and wire up a MongoDB Atlas database to our Next.js 13 app. The data was then rendered with ease through the use of asynchronous React server components. We also learned how to setup a single source of truth for our environment variables by using Vercel’s environment variables settings and CLI tool. This makes it possible to seamlessly sync our local environment variables with our Vercel project.
Next up we’re going to setup some components required to get the app ready for authentication. We’ll also be adding a few more pages to the app to get a better understanding of how Next.js 13 and React server components work.